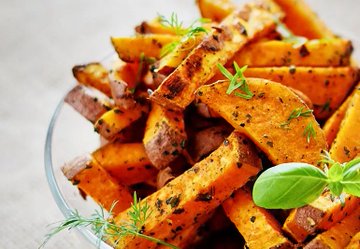
Swap regular fries for these delicious, and nutritious, potato wedges
These crispy sweet potato wedges come out Cajun spicy and sweet. Don’t tell anyone but they’re also really healthy. They’re loaded with antioxidants and phytonutrients and are a great source of beta-carotene. Another plus? As complex carbs, they digest slowly and raise blood sugars gradually — keeping you from a spike and drop-off.
Ingredients
2 sweet potatoes, cut into wedges (about 8 wedges per potato)
1 tablespoon olive oil
2 tablespoons Cajun seasoning
Directions
Preheat oven to 425 F.
In a large mixing bowl, combine the sweet potatoes, oil and Cajun seasoning. Mix well to evenly coat wedges.
Spread the wedges in a single layer on one (or two, if needed) ungreased baking sheets.
Bake for 30 minutes or until crispy and brown on one side.
Flip fries over and bake for another 30 minutes or until the wedges are crispy on the outside and tender inside.
Ingredient health benefits
Sweet potatoes: These root veggies are beloved the world over for their flavor and versatility. But did you know there’s more to sweet potatoes than … well, just being sweet? They’re also packed with essential vitamins and minerals like vitamin B6, vitamin C, vitamin A and potassium. These nutrients help support many aspects of your overall health, including your immune system, metabolism, blood pressure and vision. Sweet potatoes also have carbohydrates and fiber to fuel your cells and promote healthy digestion.
Olive oil: This cooking oil is one of those ingredients that’s actually worth the hype. Olive oil is full of unsaturated fats and polyphenols. These compounds support your heart and fight inflammation that can harm your cells. Vitamin E and vitamin K, also known as fat-soluble vitamins, maintain radiant skin and strong bones. Olive oil also elevates your good “HDL” cholesterol while lowering your “bad” (LDL) cholesterol. And powerful antioxidants suppress free radicals, damaging little particles that harm your cells in ways that can lead to cancer. While all olive oil has these benefits, extra virgin olive oil (EVOO) is the highest quality, so don’t hesitate to pick some up if it fits within your budget!
Protect and build muscle while getting essential amino acids and calcium with this protein
Milk really does do a body good. It’s high in calcium, vitamin D and potassium. And it’s also rich in a beneficial protein called casein (pronounced ”KAY-seen“).
If you’re a regular dairy milk drinker, you’re already getting some benefits of casein. But you may want to consider adding more casein to your diet. Athletes and bodybuilders have been using casein protein powder for years. But the benefits of casein aren’t just for pro sports players.
“Protein is a vital part of any balanced diet,” says registered dietitian Elyse Homan, RD, LD. “But different proteins have different effects. Understanding how each protein works is beneficial, especially if you’re supplementing with it.”
What is casein?
Casein is the main protein found in dairy milk, which includes the milk from:
Cows.
Goats.
Sheep.
Casein makes up about 80% of the protein found in milk. The other 20% comes from whey protein.
“When you think of curds and whey,” Homan says, “the solid part is casein protein, and the liquid part is whey protein.”
Help your tissues and organs change and grow as needed.
Protect your body from viruses and bacteria.
Support your body’s movement by providing cell structure.
Casein vs. whey
Casein and whey have a lot in common. They’re both:
Animal-based proteins.
Complete proteins — they contain all the amino acids your body needs.
Excellent sources of calcium.
Found in dairy milk.
The main difference is that casein is a slower-digesting protein than whey. “Casein forms a gel-like substance in your stomach,” Homan explains. “It releases more slowly than other proteins and takes longer for your body to absorb.”
Casein protein benefits
Getting the recommended daily amount of protein helps you stay healthy. But casein’s slow absorption also gives it some added advantages. The health benefits of casein include:
1. Gives you all the essential amino acids
Amino acids combine to form proteins. There are 20 amino acids that your body needs to work correctly, and they join in various ways to create different proteins.
Your body makes some of the amino acids it needs, but there are nine essential amino acids that your body can’t produce — you must get them from food. Casein is a complete protein and has all nine essential amino acids.
2. Reduces muscle breakdown
Your cells rely on regular “feedings” of amino acids to continually make proteins. When you go without eating overnight or during an extended fast, your cells may not get the needed amino acids. As a result, they look for those amino acids elsewhere and break down your body’s muscles to get them.
As a slow-release protein, casein provides your cells with the amino acids they need over a long period. The slow absorption consistently feeds your cells with amino acids, allowing muscles to recover instead of breaking down.
3. Promotes muscle growth
Casein contains a high amount of leucine, an amino acid that regulates metabolism (how your body changes food into energy) and helps build and repair muscles. If you don’t typically consume a lot of protein, adding more leucine-heavy protein to your diet (like casein) can help your muscles grow when also engaging in regular exercise.
4. Provides a good source of calcium
The casein in milk is a good source of calcium, which is essential for teeth and bone health. Not getting enough calcium can lead to a loss of bone mass and increase your risk of osteoporosis (a disease that weakens your bones).
Casein protein powder may contain up to 50% of your recommended calcium intake — but always check the label to make sure that the protein powder is a good source of calcium.
How casein protein powder can help
Casein protein’s general health benefits are good for everyone. But using casein protein powder ensures you’ll get a more significant amount of casein each day. Talk to your healthcare provider about taking casein protein powder for:
Different types of proteins affect you differently after you eat them:
Whey protein, which you absorb quickly, makes you feel full immediately after ingesting it.
Casein’s slow rate of release helps you feel fuller longer.
One study found that participants who consumed casein protein powder before a meal ate less at that meal than people who had whey protein, egg albumin (made from egg whites) or water alone.
“Our bodies only absorb so much protein at one time,” Homan clarifies. “About 30 grams of protein per meal is a good amount to consume. If you plan to have more than one serving of casein powder daily, space it out.” It may help you stave off cravings and decrease snacking between meals, too.
Overnight muscle growth and recovery
Bodybuilders and athletes know that protein is key for building muscle. But keeping your body’s protein levels up overnight can be challenging. That is, unless you ingest casein immediately before going to sleep.
Research shows that consuming casein protein before bed balances your body’s protein level throughout the night. When your protein level stays consistent, muscles can continue to grow and recover — even though you’re not eating.
What to consider before taking casein
For most people, casein doesn’t cause any side effects. But Homan says certain people may need to avoid or limit casein if they have a condition such as:
Casein allergy
If you have a milk allergy, the proteins in milk trigger your immune system and cause it to overreact. People with a milk allergy are allergic to casein, whey or both.
A severe allergy can cause anaphylaxis. More mild symptoms of a milk allergy include:
“Casein allergies are not as common in adults as in children, but they do exist,” notes Homan. If you suspect you have a milk allergy, an allergist can do a test to figure out what you’re allergic to.
Lactose intolerance
Like all dairy products, casein contains the sugar lactose. If you have lactose intolerance, your small intestine can’t digest milk sugar. When you have dairy products, you may develop symptoms including:
“Casein supplements do have lower amounts of lactose,” Homan states. “If you’d like to include casein in your diet but have a lactose sensitivity, the supplement might not trigger it. Talk to your healthcare provider if you’re interested in taking a supplement.”
Protein restrictions
People with kidney disease often need to limit their protein. Too much protein can cause too much waste in your blood. If your kidneys can’t remove the waste, the buildup of toxins can lead to serious health complications.
“People with a protein restriction, such as those with kidney disease, don’t have to avoid casein,” Homan says. “But they do need to watch how much total protein they eat. Your healthcare provider can help you figure out the right amount.”
Sources of casein protein
There are two ways you can add casein to your diet:
Casein supplements
A powdered casein supplement can help you get high amounts of it, according to Homan. The most common form of casein powder is micellar casein, or you can get a rapidly absorbing type (casein hydrolysate). One serving typically contains 24 to 27 grams of protein. Mix with water to create a protein shake, or add it to smoothies, yogurt or baked goods.
“People looking to build muscle or get more protein in their diet should talk to their healthcare provider about adding casein,” she adds. “Supplementing with casein isn’t necessary if you have a healthy, balanced diet, but it can be helpful for some people.”
The U.S. Food and Drug Administration doesn’t regulate supplements. So, it’s a good idea to look for a casein supplement that underwent third-party testing. It’s usually a sign of a higher quality product.
Casein food sources
Anyone can benefit from casein, and you and your family probably already get it from the dairy products you consume, such as:
“Adding a dairy product to your breakfast is an easy way to get some casein every day,” Homan encourages. One glass of milk has 8 grams of protein — 6.4 grams (80%) of that protein is casein. “It’s great to start your day with a good protein source.”FACEBOOK
If you run regularly, whether it’s an easy jog around the block to stay fit or an intense training regimen to prepare for a marathon, you need proper nutrition.
Here are some tips to help keep runners well-nourished and ready to win.
Foods for Runners and Joggers
A good diet can boost your physical health and help you meet your fitness goals. Make sure your meals emphasize the following basic components:
Fruit and vegetables for vitamins, minerals and antioxidants
Lean protein such as fish, poultry, beans, lentils and tofu
Healthy fats such as olive oil, avocado and nuts
Healthy carbohydrates such as rice, whole grain breads/pastas and oatmeal
Individuals may have different optimal balances, but in general, people who include running or jogging as part of their fitness regimen should get 60% to 70% of their calories from carbohydrates, with lean protein and healthy fats each accounting for 15% to 20% of their remaining calories.
Don’t skimp on carbohydrates
Although low carbohydrate diets are popular go-to’s for people wanting to lose weight, they’re not ideal for distance runners, who thrive on carbohydrates for endurance.
That is why very low carbohydrate diets, such as the ketogenic diet, plus running is not a good idea. Experts do not recommend keto to runners unless they have been told by their doctor that this a medically safe option for them and they are being monitored while in ketosis.
Distance runners need more carbs than people who aren’t training. Undereating carbohydrates can be hard on your body and affect your recovery after your run.
Here’s why: Running uses both glucose in the blood and your stores of glycogen. Glucose is the form of sugar that circulates in the bloodstream, and glycogen is the sugar stored in your liver and muscles that acts as the primary fuel for endurance exercise.
Eating plenty of carbs helps ensure that these energy stores are ready to support your training. When those stores get too low, runners are more likely to run out of energy and “burn out” or “hit a wall” while training.
Running Diet — Vitamins and Minerals
Running changes your body and your nutritional needs. Often when people start a running regimen, they are trying to lose weight or get in shape quickly, and they don’t realize they need to adjust their diet.
Especially in women runners, dietitians report seeing a tendency to overdo the running while not eating enough, and this can have an effect on health if they do not adequately replenish lost vitamins and minerals in their diet.
For women in particular, calcium and vitamin D are essential for bone health to avoid loss of bone mineral density and the risk of stress fractures.
For more vitamin D, include these foods in your meals:
Vitamin D-fortified dairy and almond, soy or rice based beverages
Eggs
Cereal fortified with vitamin D
Tuna
Salmon
For more calcium, try:
Yogurt and cheese
Tofu
Edamame
Almonds
Canned fish with bones (such as sardines)
Iron deficiency can affect women and even have an impact on their running performance. Menstruation puts people at higher risk of iron deficiency, and if iron isn’t replenished in the diet, decreases in hemoglobin can occur and bring on anemia. Hemoglobin is what carries oxygen throughout the body, including the muscles, so if there is a deficit, the muscles may feel the effect of insufficient oxygen during exercise.
Iron-rich foods include:
Poultry and other meat
Legumes, such as peas and beans
Dark, leafy green vegetables such as kale
Dried fruits and raisins
Iron-fortified breads and cereals
Dietitians recommend eating eating iron rich foods in combination with foods high in vitamin C, such as citrus, bell peppers or berries, since vitamin C helps increase the body’s absorption of iron.
What to Eat Before Running ― and When
The best time to eat a full meal is about two to three hours before you hit the road, track or trail. Have a good source of carbs paired with protein, making sure the meal focuses on a healthy carb source.
If it’s been more than three to four hours since you’ve eaten, a carbohydrate-rich snack a half-hour before running can ensure you have adequate glucose available before you head out. Directly before a run, it’s best to stick with easy-to-digest carbohydrates to avoid gastrointestinal [GI] distress such as cramping or diarrhea.
Try these:
Bananas
Applesauce
Crackers, pretzels or cereal
White bread
Potatoes
Glucose Boosters for Long Distance Runners
If you are training for a marathon or distance event and are going to be out for over an hour, you will want to bring some fuel with you. Energy drinks, gel tubes and other sources of quick blood-glucose boosters are available, but you can also use something as simple as fruit snacks.
Try practicing with these items as you train so you can pick the formulas that are best for you, and you can work on accessing and ingesting them smoothly without breaking stride.
What foods should runners avoid?
Before a run or the night before a big race, Eidel recommends going easy on:
Spicy foods or foods overly high in fat, which can cause GI upset
Foods that are very high in fiber, which can cause gas and cramping
Caffeine ― Although it is tempting to grab a caffeine boost right before a run, runners should remember that for some people, caffeine can stimulate the GI tract, which can result in diarrhea or the need for an emergency bathroom break
Does carb-loading work?
It might. Carb loading is the practice of eating a lot of carbohydrates ― particularly those that are easily absorbed, such as white bread, pasta and rice ― for 24 to 48 hours before a big race or distance run, to shore up your body’s stores of glycogen and lessen the risk of burnout before finishing the event.
Some studies show carb loading is beneficial for people preparing for a race, but it’s important to make sure during that time you’re also allowing your body to rest and giving it time to store what you are ingesting. The number of carbohydrate grams will be differ from person to person, but in general, evidence shows carb loading can be beneficial prior to a distance event.
In contrast, casual runners likely do not need to carb load. Ensuring that their day-to-day diets include extra carbohydrates can be sufficient.
What to Eat After a Run
It’s common for people not to feel hungry after a run, but a snack or light meal of complex carbohydrates and protein within the first hour after running can help replenish glycogen stores and to support recovery and rebuild stressed muscles. For example:
Peanut butter and banana
Egg on toast
Sandwich with deli meat
Pasta with meat or plant-based protein
Veggie burger on a bun
Protein shake or smoothie
Running to Lose Weight
If you’re interested in running as part of a weight loss plan, getting adequate nutrition is a must. Even casual running or jogging burns calories and can be hard on the body. Runners can become undernourished at first because they don’t understand how much energy they’re burning when they run and what they need to properly recover.
Eating enough is also essential to building muscles, which can aid in fat burning ― a plus for people working on achieving or maintaining a healthy weight.
For optimal weight loss, your plan should not rely on running alone but also include strength training and proper nutrition.
Listen to your body
If you run regularly, you should pay attention to the effects of what you eat and when, especially on running performance. Learning what works best for you can take some time and a little trial and error, but it is worth it, since running, jogging and other regular aerobic exercise offers so many health advantages.
Always feel free to consult a dietitian or doctor, and listen to your body if you’re not keeping up with your training goals.
What you see: Cute baby moments and joyful strolls. What you don’t: Sleepless nights and silent struggles. And there’s so much more! Comment below what you want to add to the list!
These tropical #fruits deserve a place on your shopping list at least once in a while. Try these suggestions when you’re craving something sweet for a snack or after dinner. https://bit.ly/3fUfqEq#HarvardHealth
Tropical fruits are those native to warm, tropical climates and include everyday favorites such as bananas and oranges. Here, we’re highlighting a few slightly more exotic choices that deserve a place on your shopping list at least once in a while. Try these suggestions when you’re craving something sweet for a snack or after dinner.
Pineapple. Sure, canned pineapple is convenient, but the flavor of a fresh pineapple is far more vibrant. Try pineapple chunks tossed with chopped fresh mint.
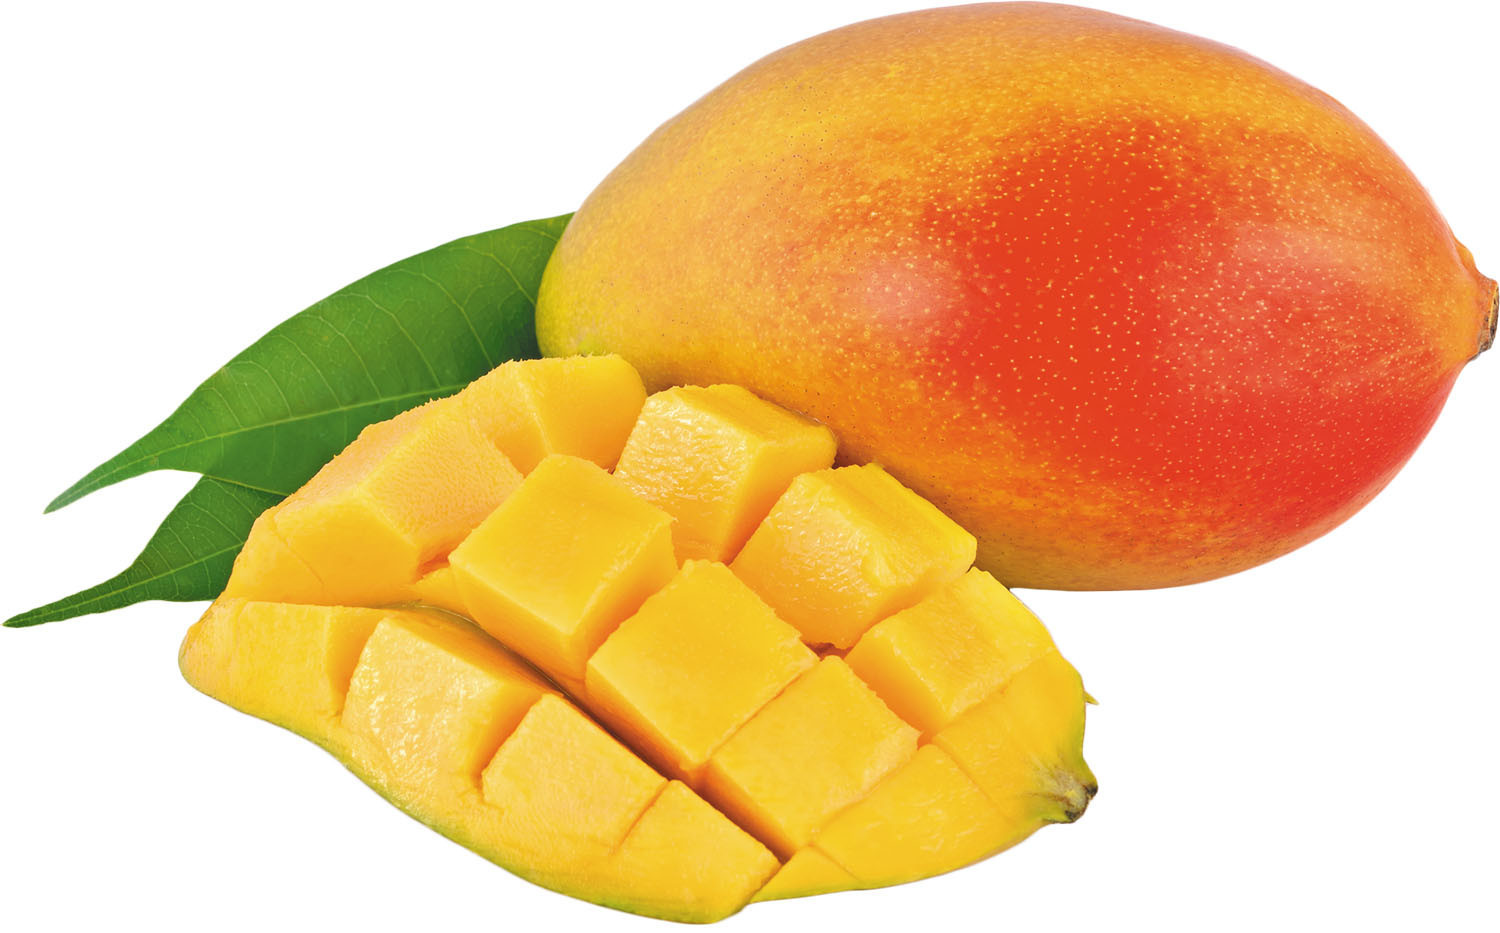
Mango. The pale orange, creamy flesh of ripe mango has a sweet, slightly spicy or pine-like flavor, according to some people. To serve, slice the mango close to the pit, then score the flesh crosswise, as shown above. If you like spicy food, sprinkle with a little chili powder.
Papaya. These large, pear-shaped fruits have reddish-orange flesh with a flavor akin to a melon with a faint floral quality. If you like, you can eat the black seeds, which have a peppery bite. Scoop the flesh out with a melon baller or spoon. A squeeze of fresh lime juice helps temper the sweetness.
Spending time in nature has always been a source of comfort and strength. Gardens and green spaces provide not only beauty and joy, but also vital support for our mental, physical and spiritual wellbeing.
Today the Royal Horticultural Society are announcing a new Rose, “Catherine’s Rose”, grown by Harkness Roses. The proceeds from this rose will support The Royal Marsden Cancer Charity, helping patients across the country live well with, and beyond, cancer 🌹1w