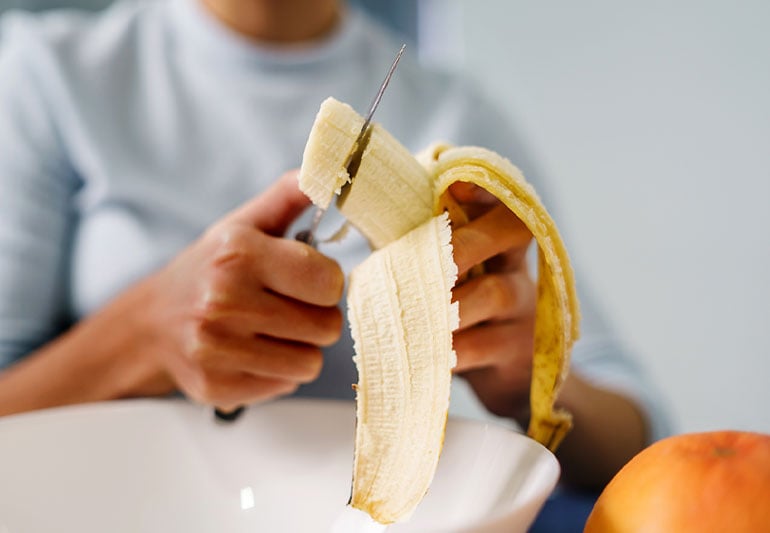
Some have called bananas “nature’s perfect snack,” and it’s easy to see why. The curvy yellow fruits come conveniently packaged, travel well in a lunch bag or purse and are incredibly versatile. They make a great smoothie mixer or a tasty topper on cereal or oatmeal and even have their very own category of (delicious!) muffins and bread.
Are bananas healthy?
“Absolutely,” says registered dietitian Elyse Homan, RD, LD. “They’re full of nutrients and easy on the gut. Very few people have problems digesting bananas.”
So, what are you eating when you peel and enjoy? A medium-sized ripe banana contains:
105 calories.
1 gram of protein.
28 grams of carbohydrates.
15 grams of (natural) sugar.
3 grams of fiber.
Less than 1 gram of fat.
Health benefits of eating bananas
From vitamins to minerals to fiber, bananas are good for you, with lots of nutrition to offer. Plus, they’re easy to digest, reiterates Homan. Here’s a breakdown of banana’s most notable nutritional benefits:
1. Fiber for improved digestion and disease prevention
With 3 grams (g) of fiber, a banana supplies nearly 10% of what you need in a day, based on a 2,000-calorie daily diet, according to the U.S. Department of Agriculture (USDA) dietary guidelines.
You hear “fiber” and probably automatically think of digestion. It’s true — fiber is great for your gut. It helps keep things moving in your intestines, and most of us probably need to eat more.
Vitamin C (ascorbic acid) is a nutrient that helps your body absorb iron and boosts your immune system’s ability to fight illness. Adults need 75 to 90 milligrams (mg) per day. A banana delivers about 10 mg of vitamin C.
Vitamin C is one of many antioxidants you can get from food. Antioxidants are important because they cancel out free radicals in your body. Free radicals can build up and damage your cells, leading to disease. But antioxidants like vitamin C keep free radicals in check.
“One banana will give you one-quarter to one-third of the vitamin B6 you need in a day,” says Homan.
4. Potassium for organ health and lower blood pressure
The USDA recommended daily intake of potassium for adults is 4,700 to 5,000 mg. A banana supplies you with about 422 mg, or a little less than 10% of what you need per day.
Potassium, a mineral, does a lot for your body. It’s essential for the proper function of your:
Heart.
Kidneys.
Muscles.
Nerves.
Getting enough potassium also keeps your blood pressure in a healthy range. Potassium, which lowers blood pressure, balances out sodium, which raises blood pressure.
Homan says potassium also benefits your vascular system — the network of blood vessels and lymph vessels that run through your body’s tissues and organs — and reduces your risk of:
Heart disease.
Kidney failure.
Stroke.
5. Magnesium for improved blood pressure, blood sugar and more
A single medium-sized banana offers about 32 mg of the mineral magnesium, which fulfills around 8% to 10% of your daily magnesium requirement.
Magnesium is involved in many processes in your body, including:
Blood pressure.
Blood sugar levels.
Building proteins.
Maintaining bone.
Muscle function.
Nerve function.
Bananas and resistant starch
Green, or unripe, bananas are high in resistant starch. “Your body can’t digest resistant starch,” notes Homan. “Instead, it’s a prebiotic that promotes the growth of good bacteria in your colon.” Prebiotics improve digestive health and can be helpful if you’re experiencing diarrhea.
“I often hear patients say they avoid bananas since they’ve heard the fruit is too high in sugar,” says Homan. As bananas ripen, much of the resistant starch changes to sugar. But the health benefits of antioxidants and fiber outweigh the naturally occurring sugar. For those worried about blood sugar levels, pair bananas with a protein source such as peanut butter or a cheese stick for better control.
A small word of warning about unripe bananas: “If you’re not used to eating resistant starch, start slowly to let your body get used to it. Some people can experience constipation, gas and bloating at first,” adds Homan.
Another plus of this fruit? In addition to all the health benefits of bananas, they’re less expensive than many other fruits.
The risks and harms associated with drinking alcohol have been systematically evaluated over the years and are well documented. The World Health Organization has now published a statement in The Lancet Public Health: when it comes to alcohol consumption, there is no safe amount that does not affect health.
It is the alcohol that causes harm, not the beverage
Alcohol is a toxic, psychoactive, and dependence-producing substance and has been classified as a Group 1 carcinogen by the International Agency for Research on Cancer decades ago – this is the highest risk group, which also includes asbestos, radiation and tobacco. Alcohol causes at least seven types of cancer, including the most common cancer types, such as bowel cancer and female breast cancer. Ethanol (alcohol) causes cancer through biological mechanisms as the compound breaks down in the body, which means that any beverage containing alcohol, regardless of its price and quality, poses a risk of developing cancer.
The risk of developing cancer increases substantially the more alcohol is consumed. However, latest available data indicate that half of all alcohol-attributable cancers in the WHO European Region are caused by “light” and “moderate” alcohol consumption – less than 1.5 litres of wine or less than 3.5 litres of beer or less than 450 millilitres of spirits per week. This drinking pattern is responsible for the majority of alcohol-attributable breast cancers in women, with the highest burden observed in countries of the European Union (EU). In the EU, cancer is the leading cause of death – with a steadily increasing incidence rate – and the majority of all alcohol-attributable deaths are due to different types of cancers.
Risks start from the first drop
To identify a “safe” level of alcohol consumption, valid scientific evidence would need to demonstrate that at and below a certain level, there is no risk of illness or injury associated with alcohol consumption. The new WHO statement clarifies: currently available evidence cannot indicate the existence of a threshold at which the carcinogenic effects of alcohol “switch on” and start to manifest in the human body.
Moreover, there are no studies that would demonstrate that the potential beneficial effects of light and moderate drinking on cardiovascular diseases and type 2 diabetes outweigh the cancer risk associated with these same levels of alcohol consumption for individual consumers.
“We cannot talk about a so-called safe level of alcohol use. It doesn’t matter how much you drink – the risk to the drinker’s health starts from the first drop of any alcoholic beverage. The only thing that we can say for sure is that the more you drink, the more harmful it is – or, in other words, the less you drink, the safer it is,” explains Dr Carina Ferreira-Borges, acting Unit Lead for Noncommunicable Disease Management and Regional Advisor for Alcohol and Illicit Drugs in the WHO Regional Office for Europe.
Despite this, the question of beneficial effects of alcohol has been a contentious issue in research for years.
“Potential protective effects of alcohol consumption, suggested by some studies, are tightly connected with the comparison groups chosen and the statistical methods used, and may not consider other relevant factors”, clarifies Dr Jürgen Rehm, member of the WHO Regional Director for Europe’s Advisory Council for Noncommunicable Diseases and Senior Scientist at the Institute for Mental Health Policy Research and the Campbell Family Mental Health Research Institute at the Centre for Addiction and Mental Health, Toronto, Canada.
We are missing the bigger picture
Globally, the WHO European Region has the highest alcohol consumption level and the highest proportion of drinkers in the population. Here, over 200 million people in the Region are at risk of developing alcohol-attributable cancer.
Disadvantaged and vulnerable populations have higher rates of alcohol-related death and hospitalization, as harms from a given amount and pattern of drinking are higher for poorer drinkers and their families than for richer drinkers in any given society.
“So, when we talk about possible so-called safer levels of alcohol consumption or about its protective effects, we are ignoring the bigger picture of alcohol harm in our Region and the world. Although it is well established that alcohol can cause cancer, this fact is still not widely known to the public in most countries. We need cancer-related health information messages on labels of alcoholic beverages, following the example of tobacco products; we need empowered and trained health professionals who would feel comfortable to inform their patients about alcohol and cancer risk; and we need overall wide awareness of this topic in countries and communities,” adds Dr Ferreira-Borges.
The risks and harms associated with drinking alcohol have been systematically evaluated over the years and are well documented. The World Health Organization has now published a statement in The Lancet Public Health: when it comes to alcohol consumption, there is no safe amount that does not affect health.
It is the alcohol that causes harm, not the beverage
Alcohol is a toxic, psychoactive, and dependence-producing substance and has been classified as a Group 1 carcinogen by the International Agency for Research on Cancer decades ago – this is the highest risk group, which also includes asbestos, radiation and tobacco. Alcohol causes at least seven types of cancer, including the most common cancer types, such as bowel cancer and female breast cancer. Ethanol (alcohol) causes cancer through biological mechanisms as the compound breaks down in the body, which means that any beverage containing alcohol, regardless of its price and quality, poses a risk of developing cancer.
The risk of developing cancer increases substantially the more alcohol is consumed. However, latest available data indicate that half of all alcohol-attributable cancers in the WHO European Region are caused by “light” and “moderate” alcohol consumption – less than 1.5 litres of wine or less than 3.5 litres of beer or less than 450 millilitres of spirits per week. This drinking pattern is responsible for the majority of alcohol-attributable breast cancers in women, with the highest burden observed in countries of the European Union (EU). In the EU, cancer is the leading cause of death – with a steadily increasing incidence rate – and the majority of all alcohol-attributable deaths are due to different types of cancers.
Risks start from the first drop
To identify a “safe” level of alcohol consumption, valid scientific evidence would need to demonstrate that at and below a certain level, there is no risk of illness or injury associated with alcohol consumption. The new WHO statement clarifies: currently available evidence cannot indicate the existence of a threshold at which the carcinogenic effects of alcohol “switch on” and start to manifest in the human body.
Moreover, there are no studies that would demonstrate that the potential beneficial effects of light and moderate drinking on cardiovascular diseases and type 2 diabetes outweigh the cancer risk associated with these same levels of alcohol consumption for individual consumers.
“We cannot talk about a so-called safe level of alcohol use. It doesn’t matter how much you drink – the risk to the drinker’s health starts from the first drop of any alcoholic beverage. The only thing that we can say for sure is that the more you drink, the more harmful it is – or, in other words, the less you drink, the safer it is,” explains Dr Carina Ferreira-Borges, acting Unit Lead for Noncommunicable Disease Management and Regional Advisor for Alcohol and Illicit Drugs in the WHO Regional Office for Europe.
Despite this, the question of beneficial effects of alcohol has been a contentious issue in research for years.
“Potential protective effects of alcohol consumption, suggested by some studies, are tightly connected with the comparison groups chosen and the statistical methods used, and may not consider other relevant factors”, clarifies Dr Jürgen Rehm, member of the WHO Regional Director for Europe’s Advisory Council for Noncommunicable Diseases and Senior Scientist at the Institute for Mental Health Policy Research and the Campbell Family Mental Health Research Institute at the Centre for Addiction and Mental Health, Toronto, Canada.
We are missing the bigger picture
Globally, the WHO European Region has the highest alcohol consumption level and the highest proportion of drinkers in the population. Here, over 200 million people in the Region are at risk of developing alcohol-attributable cancer.
Disadvantaged and vulnerable populations have higher rates of alcohol-related death and hospitalization, as harms from a given amount and pattern of drinking are higher for poorer drinkers and their families than for richer drinkers in any given society.
“So, when we talk about possible so-called safer levels of alcohol consumption or about its protective effects, we are ignoring the bigger picture of alcohol harm in our Region and the world. Although it is well established that alcohol can cause cancer, this fact is still not widely known to the public in most countries. We need cancer-related health information messages on labels of alcoholic beverages, following the example of tobacco products; we need empowered and trained health professionals who would feel comfortable to inform their patients about alcohol and cancer risk; and we need overall wide awareness of this topic in countries and communities,” adds Dr Ferreira-Borges.
Check-in with your care team, and focus on low-impact exercises and walking for good gains
If you’re living with advanced prostate cancer, you might be wondering exactly how far you should push yourself when it comes to physical activity and exercise. Should you take it easy and hold back? Or should you try to maintain your exercise routine?
And if you’ve had your prostate surgery or your prostate removed (prostatectomy) you may be concerned about any sort of limitations or restrictions on specific exercises to avoid further pain or injury.
Occupational therapist Maria Pickston, OTR/L, CLT, reminds us that each person’s medical history and cancer treatment is unique. So, before beginning any exercise program during recovery, it’s essential to obtain clearance from your oncologist or healthcare team.
Pickston shares some additional insight on how exercise can help with the process of recovery and why exercise is so important overall.
Importance of exercise for prostate health
Your prostate is part of your pelvic floor, an area densely populated with a group of muscles and connective tissues that support the functions of your bowel, bladder and reproductive organs. Your pelvic floor muscles also aid your abdominals (core muscles) and back muscles in providing structural stability to your spine.
When we talk about prostate health, we’re most often talking about modifiable risk factors, which are the things you can do to reduce the likelihood of developing prostate cancer. But if you’re living with prostate cancer, focusing on your overall health is key and exercise is a big part of that.
“When you put the words ‘cancer’ and ‘exercise” together, it can feel like such a road block because it sounds counterintuitive to be exercising when you’re going through cancer treatment,” says Pickston.
“Years ago, people were told not to exert themselves and to take it easy. But in the last 20-plus years, we’ve had an explosion of research supporting the benefits of physical activity for cancer survivors and how exercise can improve the symptoms and side effects of chemotherapy and radiation therapy.”
Exercise can have a huge impact on your physical, mental and emotional health and increase your energy levels — all things that tend to be affected when you have surgery or are going through cancer treatments.
“Prostate cancer treatment can lead to several side effects like loss of muscle mass and physical strength, sexual dysfunction, reduced bone density, increased fatigue, and a higher risk of heart disease and diabetes,” explains Pickston.
Exercise plays a vital role in tackling these challenges and enhancing the physical outcomes of treatment.
“Current research demonstrates that exercise is safe and beneficial before, during and after cancer treatment as it improves energy levels and the overall quality of life, enabling individuals to continue enjoying the activities they love,” notes Pickston. “A physically active lifestyle not only helps in lowering the risk of various cancers, but also reduces the risk of recurrence in some cancers, including prostate cancer.”
Translation: Once you check in with your care team, don’t let your cancer diagnosis stop you from working out.
How often should you exercise to promote prostate health?
If you’re living with prostate cancer, are going through cancer treatment or have had a prostatectomy, you want to talk to your healthcare provider first to before you begin any exercise program as you may need to adhere to certain precautions during those first few weeks of recovery.
There’s no one set exercise that specifically focuses on prostate health — but if you focus on improving your overall health, increasing your heart rate, improving your blood flow and getting those endorphins going, you’ll find that those things will have significant positive impact on how you’re feeling overall and your ability to recover from your condition and treatment.
“Individuals who are physically fit or active before their cancer diagnosis are more likely to regain their previous level of functioning compared to those who lead a more sedentary lifestyle,” says Pickston.
“In oncology rehabilitation, personalized programs are designed to cater to each individual’s unique circumstances. Special considerations are taken into account, including your medical history, current fitness level, the type and stage of your cancer, and the specific cancer treatment you are having to ensure that the rehab process is both safe and effective.”
Everyone responds to cancer and cancer treatments differently. What works for someone else might not come as easily for you — and that’s OK.
“Each individual’s journey is different, and your focus should be on finding an approach that suits your specific needs and abilities, fostering progress and overall well-being,” encourages Pickston.
And don’t feel like you have to push yourself too hard — you can, and should, rest when you need it the most. Exercise doesn’t always have to be a one-hour routine, either. It can be as simple as standing up and stretching during commercial breaks, walking to the end of your driveway and back, or making sure you keep up with your daily living activities around the house like laundry, cleaning and showering.
“Just the act of walking or going up and down the stairs is something you can immediately do when you get home after prostate surgery,” says Pickston. “Be patient with yourself and avoid pushing to the point of pain or excessive discomfort or fatigue. If it’s been a while since you’ve been active or your overall fitness level is low, start slowly and gradually build. The key is to be as physically active as your current condition and abilities allow.”
Aerobic exercise for prostate and sexual health
Specifically, aerobic exercise (also known as cardiovascular exercise) has wide-ranging full-body benefits that can impact your heart, brain, joints, skin and muscles. It not only extends your life expectancy, but it can also decrease your blood pressure and heart rate, and increase your blood flow, which has a direct impact on your sexual function, mood, digestion and more.
Again, if you can’t hit the ground running that fast, you can do small things to work your way back up to that routine.
“Think about all the physical activity you can do like playing with your grandkids, dancing, gardening, carrying groceries or doing chores around the house. But it’s even better if you begin to incorporate intentional exercises like brisk walking, swimming and weightlifting,” says Pickston.
“It’s crucial for those undergoing treatment to understand that exercise is the best way to treat cancer-related fatigue. As your strength and fitness improves, you can engage in meaningful activities more easily.”
One specific side effect mentioned earlier is loss of bone density, which can lead to osteoporosis, a condition where the bones become weak, less dense and more likely to increase your risk of fractures. Weight bearing exercises such as weight training, yoga, Pilates and climbing stairs are ideal for preventing bone density loss.
“Starting slowly with light weights and gradually increasing the load is key to avoid pushing too hard and experiencing pain or exhaustion,” advises Pickston. “With time and consistency, you will notice improvements in your fatigue, strength and overall health, fitness and endurance.”
Caution for cycling as exercise
Cycling is an excellent aerobic exercise, but it’s one you might want to hold off from doing at least in the early weeks after having prostate surgery. The reason is because you tend to put a lot of pressure on your sit bones and your pelvic area while cycling, and this can cause discomfort, pain and swelling if you’re not fully healed.
“You need to be sure you are cleared by your physician before initiating cycling for any amount of time first,” says Pickston. “Once you receive clearance, there are various bike seats and bike shorts available to help cushion or accommodate the perineal area, alleviating some of that pressure.”
Kegel exercises
After having prostate surgery, it’s common to experience side effects like urinary leakage and erectile dysfunction. Kegel exercises specifically are designed to help strengthen your pelvic floor muscles and reduce the likelihood of those side effects from happening as well as help quicken recovery from those side effects. These exercises are also often recommended for some people before even having surgery so their pelvic floor muscles start off having a strong foundation before going into surgery.
“Your pelvic floor is often compromised after prostate cancer treatment because surgical or radiation treatment can damage the surrounding tissues, including the muscles of the pelvic floor,” explains Pickston. “When the pelvic floor muscles are compromised, it can lead to weakness, pain and dysfunction. Seeking help from a pelvic floor physical therapist can address these issues.”
It’s also common to experience muscle tightness in your pelvic floor and surrounding muscles after treatment, and doing Kegels without proper guidance can worsen this tightness.
“A pelvic floor therapist will help to make sure you are performing your Kegels correctly and help guide you in managing areas of muscle tightness in your pelvic floor,” says Pickston. “Learning how to engage the pelvic floor muscles correctly during daily activities can significantly reduce leakage. Sometimes, just a few simple adjustments in movement can lead to dramatic improvement.”
Healthy weight and prostate health
Having overweight or obesity increases your risk for prostate cancer — but it can also provide additional complications during the recovery process in some cases.
“If you’ve had a prostatectomy, it’s normal to experience emotional ups and downs, but the important thing is that you focus on what small things you can do each day, to feel better every day,” says Pickston. “Physical activity improves both your physical and emotional health. It’s important for managing weight, maintaining or building muscle, reducing your risk of heart disease and keeping your bones strong.”
“You want to get up, go outside and see what’s going on in your neighborhood,” encourages Pickston. “When you start exercising, your sleep improves. When your sleep improves, you’re able to heal better. And the more you can do early on, the more long-term effects you’ll experience along the way.”
We all want to protect our kids whether it be from falls, bumps and bruises — or avoidable infections and diseases. To help your child avoid illness, it’s important to encourage good habits and take steps to boost their immune system from an early age.
“Most of what makes a child’s immune system strong is common sense,” says pediatrician Adriane Lioudis, MD. If you keep these five tips in mind, you’ll stack the deck in your child’s favor for a healthier life.
1. For newborns, consider breastfeeding
While it’s a very personal decision (that isn’t always possible), if you are able to exclusively breastfeed your child for at least six months, it may have benefits. Some research shows that breastfeeding your child might possibly reduce allergies, Dr. Lioudis says.
2. Promote regular hand washing
Eighty percent of infections are spread by touch. Teach your little one to take the time to wash their hands after sneezing, coughing and going to the bathroom. Washing hands with warm water and soap for at least 20 seconds can remove bacteria and viruses and can reduce the chance of lung infections by up to 45%.
“Get the flu shot for your child yearly, as well,” Dr. Lioudis says. This is particularly important for children with asthma and other chronic health conditions.
Also, if your family will be traveling internationally, it’s important to seek advice from your child’s healthcare provider about any needed vaccinations.
4. Make sleep a priority
To maximize immunity, children must get enough sleep.
Babies between 0 and 3 months need 14 to 17 hours of sleep. Those between 4 and 12 months need 12 to 16 hours of sleep.
Children between the ages of 1 and 2 need between 11 and 14 hours.
Kids between the ages of 3 and 5 should get from10 to 13 hours.
Children ages 6 to 12 should get between 9 and 12 hours.
Teens between the ages of 13 to 18 need 8 to 10 hours.
Not getting enough sleep limits the body’s ability to produce proteins called cytokines that help fight infection and reduce inflammation.
5. Encourage a healthy diet
A healthy diet is also important for your child’s immune system.
Dr. Lioudis recommends encouraging your child to “eat the rainbow” when it comes to fruits and vegetables. A good selection of whole grains should be part of their diet as well. Keep processed foods to a minimum. Proper food choices can help ensure that your child gets enough vitamins — such as vitamin A and E. These vitamins are needed to maintain good health and a strong immune system.
You can’t avoid all illness, but some kids need extra protection
“Even if you follow these tips, your child might still get between seven and 11 colds each year,” says Dr. Lioudis. She adds that you can expect each one to last up to two weeks.
Also, keep in mind that some things billed as common “remedies” aren’t effective in boosting immunity. For example, there’s no definitive proof that large amounts of vitamin C or echinacea help prevent colds or shorten them, she says.
However, if your child has a compromised immune system, work closely with your pediatrician to find ways to improve his or her immunity. Each child needs a personalized approach because their individual immune system varies, Dr. Lioudis says.
“There’s generally a different protocol with immunocompromised children. There are some vaccines we have to add in on top of what most children have, but it’s something that we must determine on a case-by-case basis.
Swap regular fries for these delicious, and nutritious, potato wedges
These crispy sweet potato wedges come out Cajun spicy and sweet. Don’t tell anyone but they’re also really healthy. They’re loaded with antioxidants and phytonutrients and are a great source of beta-carotene. Another plus? As complex carbs, they digest slowly and raise blood sugars gradually — keeping you from a spike and drop-off.
Ingredients
2 sweet potatoes, cut into wedges (about 8 wedges per potato)
1 tablespoon olive oil
2 tablespoons Cajun seasoning
Directions
Preheat oven to 425 F.
In a large mixing bowl, combine the sweet potatoes, oil and Cajun seasoning. Mix well to evenly coat wedges.
Spread the wedges in a single layer on one (or two, if needed) ungreased baking sheets.
Bake for 30 minutes or until crispy and brown on one side.
Flip fries over and bake for another 30 minutes or until the wedges are crispy on the outside and tender inside.
Ingredient health benefits
Sweet potatoes: These root veggies are beloved the world over for their flavor and versatility. But did you know there’s more to sweet potatoes than … well, just being sweet? They’re also packed with essential vitamins and minerals like vitamin B6, vitamin C, vitamin A and potassium. These nutrients help support many aspects of your overall health, including your immune system, metabolism, blood pressure and vision. Sweet potatoes also have carbohydrates and fiber to fuel your cells and promote healthy digestion.
Olive oil: This cooking oil is one of those ingredients that’s actually worth the hype. Olive oil is full of unsaturated fats and polyphenols. These compounds support your heart and fight inflammation that can harm your cells. Vitamin E and vitamin K, also known as fat-soluble vitamins, maintain radiant skin and strong bones. Olive oil also elevates your good “HDL” cholesterol while lowering your “bad” (LDL) cholesterol. And powerful antioxidants suppress free radicals, damaging little particles that harm your cells in ways that can lead to cancer. While all olive oil has these benefits, extra virgin olive oil (EVOO) is the highest quality, so don’t hesitate to pick some up if it fits within your budget!
A creamy smoothie with crunchy toppings — in a bowl!
Ingredients
Smoothie base
1 1/2 cups plain yogurt
1 banana, frozen
1/2 cup orange juice
1 cup berries of your choice
1 tablespoon flaxseeds
1 scoop vanilla plant-based protein powder, optional
Toppings
1 tablespoon slivered almonds
1 teaspoon chia seeds
1 tablespoon pomegranate seeds
Directions
Blend all base ingredients together until smooth, adjusting for sweetness and thickness.
Serve immediately in a large bowl with toppings.
Ingredient health benefits
Yogurt: With probiotics and prebiotics to go around, yogurt is a great way to show your stomach some love. Yogurt is also a complete protein, which means it has all nine essential amino acids that your body needs to function properly (but can’t make on its own). And, most famously, it has calcium to keep your bones happy and healthy.
Bananas: Most everyone knows that bananas are a great source of potassium, but there’s so much more to this zany-looking fruit than popular knowledge conveys. Bananas also have magnesium and vitamin B6, which help regulate blood pressure and metabolism. And they have fiber to keep your gut working properly.
Flaxseed: This little seed really is worth the hype. Flaxseed is a source of omega-3 fatty acids (omega-3s, for short), which are vital for your body to function as it should. Flaxseed also has fiber and antioxidants that fight damaging free radicals and chronic inflammation.
Chia seeds: Another tiny seed with plenty of perks, chia seeds improve your digestion and promote the growth of good bacteria that keep your gut healthy. Their quirky ability to expand in fluid can help you stay fuller for longer when they’re in your stomach juices, which can be helpful if you’re trying to lose weight.
Pomegranate seeds: These little gems are as good for you as they taste. The squishy packets around the seeds contain juice that’s high in antioxidants, which might support the health of your heart. Pomegranate juice may also have cancer-fighting abilities, but research is ongoing. Still, incorporating pomegranates into a hearty, nutritious diet wouldn’t hurt!
Nutrition information (per serving)
Makes 4 servings Serving = 3/4 cup
Calories: 160 Carbohydrate: 27 g Sugars: 17 g Fiber: 4 g Saturated fat: 0.5 g Cholesterol: 5 mg Protein: 9 g Sodium: 70 mg
Some have called bananas “nature’s perfect snack,” and it’s easy to see why. The curvy yellow fruits come conveniently packaged, travel well in a lunch bag or purse and are incredibly versatile. They make a great smoothie mixer or a tasty topper on cereal or oatmeal and even have their very own category of (delicious!) muffins and bread.
Are bananas healthy?
“Absolutely,” says registered dietitian Elyse Homan, RD, LD. “They’re full of nutrients and easy on the gut. Very few people have problems digesting bananas.”
So, what are you eating when you peel and enjoy? A medium-sized ripe banana contains:
105 calories.
1 gram of protein.
28 grams of carbohydrates.
15 grams of (natural) sugar.
3 grams of fiber.
Less than 1 gram of fat.
Health benefits of eating bananas
From vitamins to minerals to fiber, bananas are good for you, with lots of nutrition to offer. Plus, they’re easy to digest, reiterates Homan. Here’s a breakdown of banana’s most notable nutritional benefits:
1. Fiber for improved digestion and disease prevention
With 3 grams (g) of fiber, a banana supplies nearly 10% of what you need in a day, based on a 2,000-calorie daily diet, according to the U.S. Department of Agriculture (USDA) dietary guidelines.
You hear “fiber” and probably automatically think of digestion. It’s true — fiber is great for your gut. It helps keep things moving in your intestines, and most of us probably need to eat more.
Vitamin C (ascorbic acid) is a nutrient that helps your body absorb iron and boosts your immune system’s ability to fight illness. Adults need 75 to 90 milligrams (mg) per day. A banana delivers about 10 mg of vitamin C.
Vitamin C is one of many antioxidants you can get from food. Antioxidants are important because they cancel out free radicals in your body. Free radicals can build up and damage your cells, leading to disease. But antioxidants like vitamin C keep free radicals in check.
“One banana will give you one-quarter to one-third of the vitamin B6 you need in a day,” says Homan.
4. Potassium for organ health and lower blood pressure
The USDA recommended daily intake of potassium for adults is 4,700 to 5,000 mg. A banana supplies you with about 422 mg, or a little less than 10% of what you need per day.
Potassium, a mineral, does a lot for your body. It’s essential for the proper function of your:
Heart.
Kidneys.
Muscles.
Nerves.
Getting enough potassium also keeps your blood pressure in a healthy range. Potassium, which lowers blood pressure, balances out sodium, which raises blood pressure.
Homan says potassium also benefits your vascular system — the network of blood vessels and lymph vessels that run through your body’s tissues and organs — and reduces your risk of:
Heart disease.
Kidney failure.
Stroke.
5. Magnesium for improved blood pressure, blood sugar and more
A single medium-sized banana offers about 32 mg of the mineral magnesium, which fulfills around 8% to 10% of your daily magnesium requirement.
Magnesium is involved in many processes in your body, including:
Blood pressure.
Blood sugar levels.
Building proteins.
Maintaining bone.
Muscle function.
Nerve function.
Bananas and resistant starch
Green, or unripe, bananas are high in resistant starch. “Your body can’t digest resistant starch,” notes Homan. “Instead, it’s a prebiotic that promotes the growth of good bacteria in your colon.” Prebiotics improve digestive health and can be helpful if you’re experiencing diarrhea.
“I often hear patients say they avoid bananas since they’ve heard the fruit is too high in sugar,” says Homan. As bananas ripen, much of the resistant starch changes to sugar. But the health benefits of antioxidants and fiber outweigh the naturally occurring sugar. For those worried about blood sugar levels, pair bananas with a protein source such as peanut butter or a cheese stick for better control.
A small word of warning about unripe bananas: “If you’re not used to eating resistant starch, start slowly to let your body get used to it. Some people can experience constipation, gas and bloating at first,” adds Homan.
Another plus of this fruit? In addition to all the health benefits of bananas, they’re less expensive than many other fruits.
This transitional and restorative yoga pose provides a full-body stretch
Physical therapist Dawn Lorring, PT, MPT, walks through the steps of how to do downward dog correctly and shares its many benefits.
From beginner’s yoga to more advanced practices, downward dog is one of the most popular poses…with a few common misconceptions.
Rounding your back, placing your feet too far apart or putting too much weight into your wrists can all create a deeper stretch than intended — which increases your risk of injury.
Physical therapist Dawn Lorring, PT, MPT, walks through the steps of how to do downward dog correctly and shares its many benefits.
What is downward dog?
Downward dog (also known as downward facing dog, facing dog pose or Adho Mukha Svanasana in Sanskrit) is a foundational yoga pose. It’s often used as a transition between movements, like sun salutations. It’s also a form of active resting, active stretching and strengthening. This allows you to check in with yourself and re-evaluate your intentions during your practice.
You do downward facing dog by putting your body into an inverted V-shape (or pyramid), as if there were a straight line that runs through the top of your head up your spine and out of your butt toward the ceiling.
How to properly do downward facing dog
Facing dog pose won’t usually be your first movement when doing yoga. Before trying it, it’s best to loosen up your muscles and joints and find ways to work it into your overall yoga practice.
Once you’re warmed up and ready to go, follow these steps:
Start on all fours with your hands shoulder-width apart and your knees in line directly behind your hips.
Spreading your fingers wide, press down into your hands and tuck your toes (almost like you’re using them to grip the floor beneath you).
As you exhale, bring your hips up and back, as if there’s a string pulling your butt toward the ceiling, so your body creates an inverted V-shape (or pyramid).
Focus on straightening your back, not rounding it, so your head and neck are relaxed between your upper arms. It helps to focus on pressing through your arms to “push” the ground away from you and keep your arms active.
Keep your legs straight and, if it’s comfortable for you to do so, try to drop your heels down to the floor.
Adjust your posture by shifting your weight between your hands and feet until you sink comfortably into the position.
Hold this pose for 10 to 15 seconds at a time, making sure to breathe throughout.
For a more relaxed stretch, bend your knees a little and readjust your posture as needed.
When you’re done, exhale and move into your next pose or slowly lower yourself to the floor to enter child’s pose.
“Downward facing dog isn’t about keeping your heels on the ground or holding it for long periods of time,” clarifies Lorring. “It’s really about making sure you’re going to a place that’s comfortable for you, so you can adjust your body as often as you need in this pose.”
Facing dog pose variations
If you have a hard time getting down on your hands and knees, try this wall variation:
Face the wall and place both your hands out in front of you so your palms are flat and your fingers are stretched out.
Keeping your head and back straight and your hands on the wall in front of you, slowly walk your legs backward.
As you move, walk your hands down the wall so you hinge at your hips and look directly at the floor.
Keeping your head and neck relaxed, hold this pose for 10 to 15 seconds before slowly returning to stand.
If you feel stress or discomfort in your wrists, you can modify by rolling up a towel or the edge of your yoga mat and placing the roll under the heels of your hands. This will decrease some of that pressure.
For a more challenging stretch that deeply engages your hips and hamstrings:
While in the downward facing dog position, lift one leg up and stretch it toward the ceiling.
For a deeper stretch, bend your outstretched leg back and over your body, so your knee is facing away from you.
Repeat this process with the other leg, holding the pose for as long as you feel comfortable on either side.
Downward dog benefits
Downward facing dog provides a full body stretch, while also strengthening and working your:
Adho Mukha Svanasana helps improve your flexibility and control, and provides you a moment of active rest. It also increases blood flow to your head and upper body when you’re in the inverted V position. But because of this, you should talk to your yoga instructor, athletic trainer or healthcare provider before starting this position if you have:
“Facing dog pose tries to improve flexibility but also builds the strength to control that flexibility,” says Lorring. “If you’re feeling excessive stress to a certain part of your body, then you’re probably holding the pose for too long or you’re trying to go into a range that you’re not ready for. We can help you get there.”