This is a last-minute dessert that can be made post-dinner, while you brew the coffee and finish clearing the table. Have ingredients and equipment ready beforehand — just be sure to turn the pineapple once and give the skillet a couple of shakes and voila! You’ll have a delightfully sweet dessert ready at your fingertips.
Ingredients
1/4 cup sugar 1/4 cup sugar substitute 1 pineapple, peeled, cored and sliced into six wedges lengthwise Butter-flavored cooking spray, refrigerated 1 tablespoon trans-fat free margarine 2 tablespoons Cognac or fresh orange juice 1 cup fresh raspberries
Directions
Combine the sugar and sugar substitute. Sprinkle half of the mixture over one side of the pineapple. Turn and sprinkle the rest on the other side.
Lightly coat a large non-stick skillet with cooking spray. Add the margarine and melt over high heat. Place the pineapple in the skillet and cook, turning once and shaking the pan often, until it turns golden brown, 10 to 15 minutes. (The pineapple can be prepared to this point and held for one hour.)
Transfer the pineapple wedges to six dessert dishes, leaving the sauce that has formed in the pan.
Stir the cognac into the pan to thin the sauce. Heat briefly. Drizzle the sauce over the pineapple and sprinkle with equal portions of the raspberries. Serve warm.
Nutritional information (per serving)
Makes 6 servings
Calories: 118 Total fat: 3 g Protein: 0.1 g Carbohydrate: 22 g Dietary fiber: 2 g Cholesterol: 0 mg Sodium: 0 mg Potassium: 122 mg
On World Health Day, we are emphasising the importance of proactive health management through informed dietary choices. Nutrition plays a critical role in preventative care, supporting overall well-being and mitigating the risk of chronic diseases.
Adopting a balanced and personalised approach to dietetics can significantly contribute to improved health outcomes.
Our team of experienced dietitians provides comprehensive nutritional assessments and tailored plans to meet individual needs. We are committed to empowering individuals to take control of their health through evidence-based dietary strategies.
Learn more about our Dietetics & Nutrition services and how we can support your health goals: https://ow.ly/mp0q50VsnLX
#MayoClinicRecipes: These cranberry orange muffins would make a nice #breakfast treat this weekend. Use Greek yogurt to reduce or replace shortening, oil or butter. This cuts fat and makes muffins extra moist and tender. https://mayocl.in/2Oc6EDS
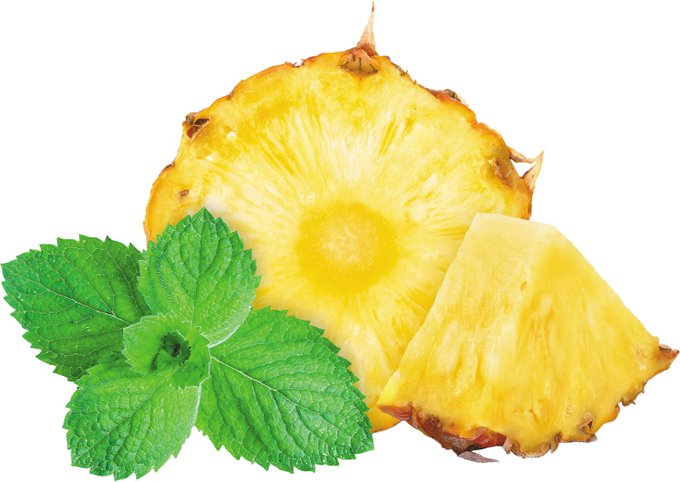
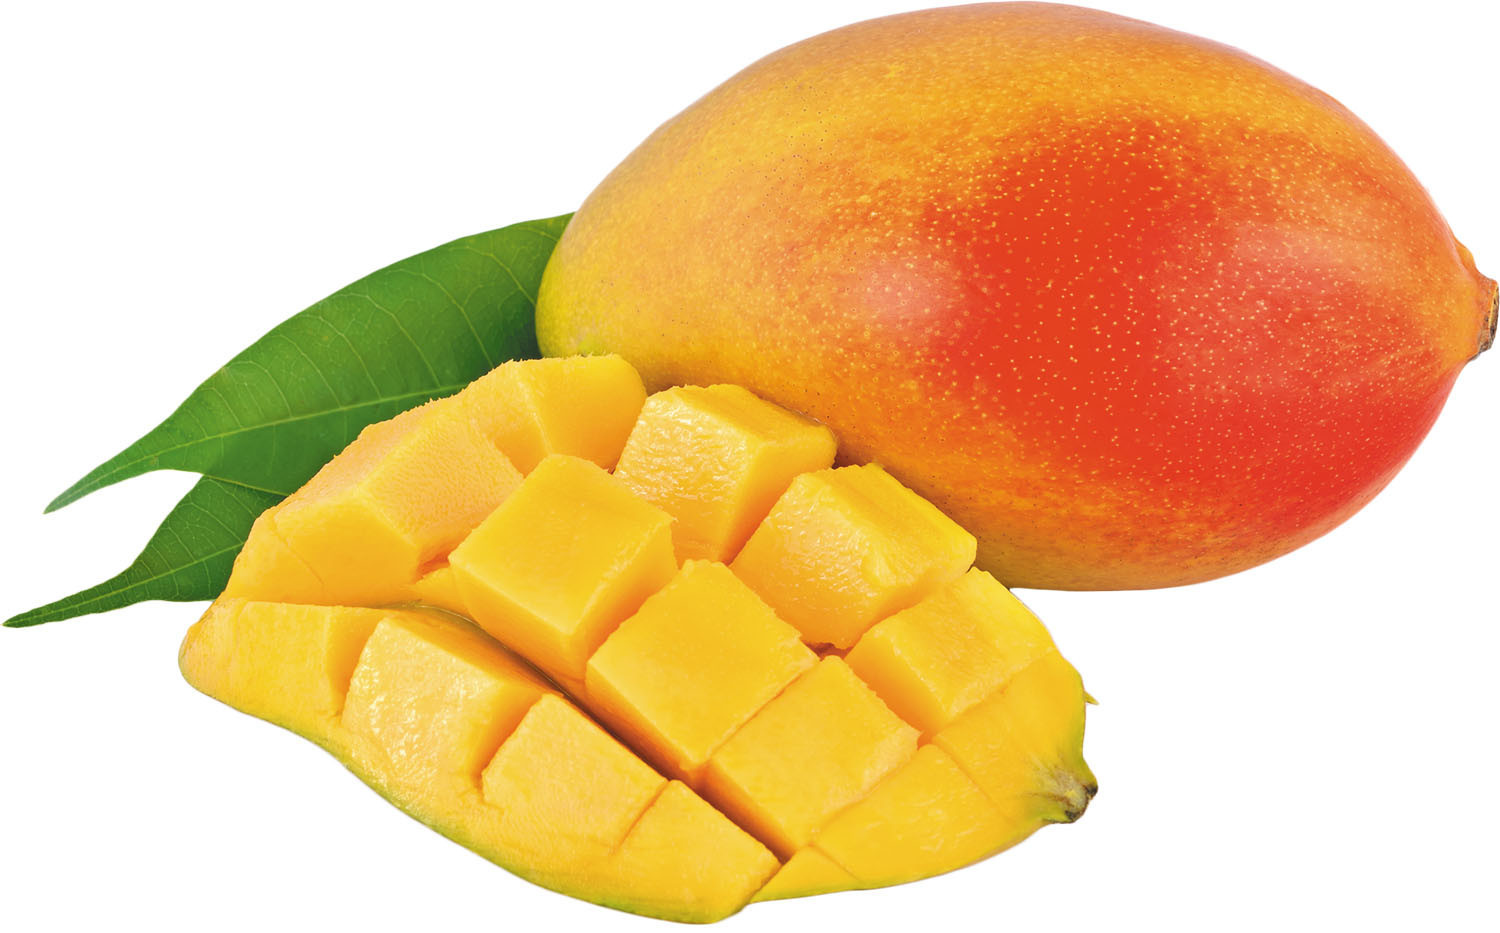
These tropical #fruits deserve a place on your shopping list at least once in a while. Try these suggestions when you’re craving something sweet for a snack or after dinner. https://bit.ly/3fUfqEq#HarvardHealth
Tropical fruits are those native to warm, tropical climates and include everyday favorites such as bananas and oranges. Here, we’re highlighting a few slightly more exotic choices that deserve a place on your shopping list at least once in a while. Try these suggestions when you’re craving something sweet for a snack or after dinner.
Pineapple. Sure, canned pineapple is convenient, but the flavor of a fresh pineapple is far more vibrant. Try pineapple chunks tossed with chopped fresh mint.
Mango. The pale orange, creamy flesh of ripe mango has a sweet, slightly spicy or pine-like flavor, according to some people. To serve, slice the mango close to the pit, then score the flesh crosswise, as shown above. If you like spicy food, sprinkle with a little chili powder.
Papaya. These large, pear-shaped fruits have reddish-orange flesh with a flavor akin to a melon with a faint floral quality. If you like, you can eat the black seeds, which have a peppery bite. Scoop the flesh out with a melon baller or spoon. A squeeze of fresh lime juice helps temper the sweetness.
March is Endometriosis Awareness Month. Did you know this condition affects 1 in 10 women?
Endometriosis can cause debilitating pain, fertility issues, and significantly impact quality of life.
Megan Davenport, MISCP, Senior Physiotherapist in Pelvic Health at Blackrock Clinic, sheds light on the condition and its symptoms:
“Endometriosis can affect women at any age, from puberty to menopause, though its impact may persist throughout life. It is not just “bad period pain”—it is a long-term condition, and each person’s experience with endometriosis is different.
Women with endometriosis experience a wide range of symptoms, with the most commonly recognised including:
– Heavy periods (needing to change pads/tampons every hour or so)
– Painful periods that interfere with daily activities
– Pelvic, abdominal or back pain, sometimes radiating down the thighs
– Pain during or after sex
– Pain with urination or having a bowel motion
Fatigue, bloating and nausea can also be experienced as well as anxiety and depression.
A top-down view of a chocolate smoothie bowl (thick smoothie served in a bowl with a spoon) garnished with chia seeds, large coconut flakes and cacao nibs. Healthy vegan breakfast. The smoothie portion contains banana, chocolate, almond milk and ice.
This pudding is packed with health-promoting chia seeds, almond milk, cinnamon, cocoa, coconut flakes and dried fruit. It’s the perfect chocolate treat.
Ingredients
½ cup Chia seeds
1 cup vanilla almond milk, unsweetened
1 cup 2% milk (may use all almond for non-dairy option)
1½ tablespoons honey
1 tablespoon cocoa powder, unsweetened
1 teaspoon cinnamon
1 teaspoon vanilla extract
2 tablespoons coconut flakes, unsweetened
2 tablespoons dried tart cherries, or other unsweetened dried fruit
Directions
Place chia seeds, milks, honey, cocoa, cinnamon and vanilla in a glass container with a tight lid.
Seal and shake well to combine. Refrigerate for at least 5 hours or overnight.
Serve topped with coconut flakes and dried fruit to garnish.
Note: For a smoother texture, blend pudding in a high power blender before refrigerating. Be sure to blend well to avoid a gritty texture.
Nutrition information
Makes 6 servings
Each 1/2 cup serving contains:
Calories 140
Total fat 7g
Saturated fat 2g
Trans fat 0g
Protein 4g
Total carbohydrate 16g
Fiber 6g
Sugar 7g
Cholesterol 5mg
Sodium 150mg
The risks and harms associated with drinking alcohol have been systematically evaluated over the years and are well documented. The World Health Organization has now published a statement in The Lancet Public Health: when it comes to alcohol consumption, there is no safe amount that does not affect health.
It is the alcohol that causes harm, not the beverage
Alcohol is a toxic, psychoactive, and dependence-producing substance and has been classified as a Group 1 carcinogen by the International Agency for Research on Cancer decades ago – this is the highest risk group, which also includes asbestos, radiation and tobacco. Alcohol causes at least seven types of cancer, including the most common cancer types, such as bowel cancer and female breast cancer. Ethanol (alcohol) causes cancer through biological mechanisms as the compound breaks down in the body, which means that any beverage containing alcohol, regardless of its price and quality, poses a risk of developing cancer.
The risk of developing cancer increases substantially the more alcohol is consumed. However, latest available data indicate that half of all alcohol-attributable cancers in the WHO European Region are caused by “light” and “moderate” alcohol consumption – less than 1.5 litres of wine or less than 3.5 litres of beer or less than 450 millilitres of spirits per week. This drinking pattern is responsible for the majority of alcohol-attributable breast cancers in women, with the highest burden observed in countries of the European Union (EU). In the EU, cancer is the leading cause of death – with a steadily increasing incidence rate – and the majority of all alcohol-attributable deaths are due to different types of cancers.
Risks start from the first drop
To identify a “safe” level of alcohol consumption, valid scientific evidence would need to demonstrate that at and below a certain level, there is no risk of illness or injury associated with alcohol consumption. The new WHO statement clarifies: currently available evidence cannot indicate the existence of a threshold at which the carcinogenic effects of alcohol “switch on” and start to manifest in the human body.
Moreover, there are no studies that would demonstrate that the potential beneficial effects of light and moderate drinking on cardiovascular diseases and type 2 diabetes outweigh the cancer risk associated with these same levels of alcohol consumption for individual consumers.
“We cannot talk about a so-called safe level of alcohol use. It doesn’t matter how much you drink – the risk to the drinker’s health starts from the first drop of any alcoholic beverage. The only thing that we can say for sure is that the more you drink, the more harmful it is – or, in other words, the less you drink, the safer it is,” explains Dr Carina Ferreira-Borges, acting Unit Lead for Noncommunicable Disease Management and Regional Advisor for Alcohol and Illicit Drugs in the WHO Regional Office for Europe.
Despite this, the question of beneficial effects of alcohol has been a contentious issue in research for years.
“Potential protective effects of alcohol consumption, suggested by some studies, are tightly connected with the comparison groups chosen and the statistical methods used, and may not consider other relevant factors”, clarifies Dr Jürgen Rehm, member of the WHO Regional Director for Europe’s Advisory Council for Noncommunicable Diseases and Senior Scientist at the Institute for Mental Health Policy Research and the Campbell Family Mental Health Research Institute at the Centre for Addiction and Mental Health, Toronto, Canada.
We are missing the bigger picture
Globally, the WHO European Region has the highest alcohol consumption level and the highest proportion of drinkers in the population. Here, over 200 million people in the Region are at risk of developing alcohol-attributable cancer.
Disadvantaged and vulnerable populations have higher rates of alcohol-related death and hospitalization, as harms from a given amount and pattern of drinking are higher for poorer drinkers and their families than for richer drinkers in any given society.
“So, when we talk about possible so-called safer levels of alcohol consumption or about its protective effects, we are ignoring the bigger picture of alcohol harm in our Region and the world. Although it is well established that alcohol can cause cancer, this fact is still not widely known to the public in most countries. We need cancer-related health information messages on labels of alcoholic beverages, following the example of tobacco products; we need empowered and trained health professionals who would feel comfortable to inform their patients about alcohol and cancer risk; and we need overall wide awareness of this topic in countries and communities,” adds Dr Ferreira-Borges.