A salad combination you may not have thought of, but will now be hooked on
This salad is a perfect addition to a large dinner menu when you have guests over for dinner and have a lot of other dishes to prepare. It’s bright and flavorful, and you can make the dressing a day or two ahead to prep!
Ingredients
Dressing
1 1/2 cups frozen raspberries, thawed 2 to 4 tablespoons orange juice (depending on thickness desired) 1 tablespoon white wine vinegar 1 teaspoon sugar 1 tablespoon orange zest 4 tablespoons chopped fresh chives
Salad
1 pound romaine lettuce, washed, dried and torn into bite-sized pieces 1 pound radicchio, washed, dried, shredded 3 carrots, peeled and grated 1 cup mandarin oranges, drained, patted dry 20 cherry tomatoes, quartered
Directions
Assemble salad ingredients in salad bowl and toss.
Put all ingredients for the dressing in food processor or blender (except for 2 tablespoons chives), and process.
After all is processed, stir in the remaining 2 tablespoons chives.
Pour over salad just before serving and toss.
Nutrition information (per serving)
Calories: 107 Total fat: 0.5 g Saturated fat: 0.1 g Protein: 3 g Carbohydrate: 25 g Fiber: 5.4 g Sodium: 37 mg
—Recipe developed and copyrighted by Kristine Napier, MPH, RD, LD.
Research shows that Generation Z is drinking far less alcohol than previous generations. So what’s behind this trend – and does that mean alcohol and drug use worries are disappearing? Let’s break the topic down in this podcast with addiction psychiatrist Akhil Anand. pic.twitter.com/PrqU7IbBlP
Up to 85% of people in the U.S. experience back pain in their lifetime. And 28% of people with chronic pain turn to alcohol for relief. So, it can be helpful to understand possible connections between the two. There are many reasons you may experience back pain, and alcohol can… pic.twitter.com/BmRjRJpPgQ
If you’re planning to start an exercise program and wondering where to begin, start with your core first, says physical therapist Brittany Smith, DPT. People often think of the core muscles as being the abdominal muscles, but the core includes the muscles in the abdomen, back and hips, all working together as a group.
“The core muscles provide stability for the entire body as it moves,” says Smith. “These muscles are activated when you stand up, turn, bend, reach, twist, stoop and move in most other ways. Everything starts with your core.”
Strong core muscles help you maintain good posture, while weak ones can lead to slouching and slumping. Poor posture can be a cause of aches and pain, especially in the back.
Getting started with your core
To get your core muscles in shape, you need to exercise.
“Our bodies were made to move, so any physical activity is really important,” says Smith.
She recommends these specific core-strengthening exercises below.
The first one engages the deep muscles in the abdomen, called the transverse abdominis. “These muscles help hold us in a better position to stabilize our core, thereby stabilizing our arms and legs,” says Smith.
“The more you work on these muscles, the more it will become second nature to hold these muscles tight when you’re lifting grocery bags, doing yard work or any other kind of physical activity,” says Smith. This will help support your body.
Other muscles that tend to be weak are the gluteus maximus in the buttocks, and the gluteus medius and gluteus minimus on the side of the hip. The bridge and clamshell exercises can help strengthen these muscles.
Smith emphasizes that getting the proper position of these exercises correct is more important than the number of repetitions you do. “It’s better to take your time, maybe do fewer reps, but with better quality,” she says. For that reason, it can be helpful to have the guidance of a physical therapist to get started.
Move on from the core
Core exercises are the starting point of overall fitness because you need to hold those muscles engaged while you strengthen other muscles, such as the biceps in the arms or the quadriceps in the legs.
Smith suggests setting short-term goals (for about a month) and then more long-term goals. Once you have achieved short-term goals, such as getting around more easily, add other types of weight-training or resistance exercises to build muscle elsewhere.
With any exercise you do, always listen to your body, warns Smith. If you have pain other than muscle burn, take it easy. Reduce the number of repetitions, the weight or the duration of the exercises. Then build up gradually. “You don’t have to be in pain to make gains,” she says.
Beginner exercises for core strength
For each of the following, work up to one to two sets of 10 to 15 repetitions once a day.
Abdominal bracing
Lie on your back with your knees bent and feet flat on the floor. Contract your abdominal muscles, and press the arch of your back down toward the floor, pulling your belly button toward your spine. Hold for 5 to 10 seconds. Make sure your lower back stays flat on the floor. Relax and repeat.
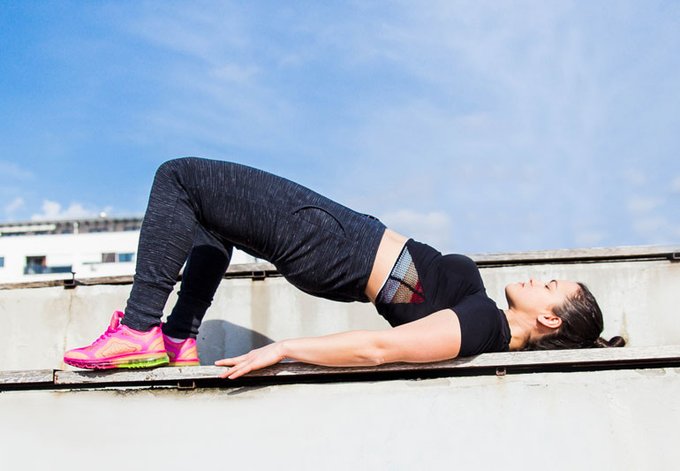
Bridge
Lie on your back with your knees bent and feet flat on the floor with your arms at your sides. Squeeze your abdominal and buttocks muscles, push your heels into the floor and slowly lift your buttocks and hips off the floor. Keep your back straight. Hold for 5 to 10 seconds.
Clamshell
Lie on your side with knees bent in line with your hips and back, draw up the top knee while keeping contact of your feet together as shown. Don’t let your pelvis roll back during the lifting movement. Hold for 5 seconds.
Check-in with your care team, and focus on low-impact exercises and walking for good gains
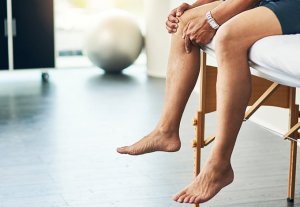
If you’re living with advanced prostate cancer, you might be wondering exactly how far you should push yourself when it comes to physical activity and exercise. Should you take it easy and hold back? Or should you try to maintain your exercise routine?
And if you’ve had your prostate surgery or your prostate removed (prostatectomy) you may be concerned about any sort of limitations or restrictions on specific exercises to avoid further pain or injury.
Occupational therapist Maria Pickston, OTR/L, CLT, reminds us that each person’s medical history and cancer treatment is unique. So, before beginning any exercise program during recovery, it’s essential to obtain clearance from your oncologist or healthcare team.
Pickston shares some additional insight on how exercise can help with the process of recovery and why exercise is so important overall.
Importance of exercise for prostate health
Your prostate is part of your pelvic floor, an area densely populated with a group of muscles and connective tissues that support the functions of your bowel, bladder and reproductive organs. Your pelvic floor muscles also aid your abdominals (core muscles) and back muscles in providing structural stability to your spine.
When we talk about prostate health, we’re most often talking about modifiable risk factors, which are the things you can do to reduce the likelihood of developing prostate cancer. But if you’re living with prostate cancer, focusing on your overall health is key and exercise is a big part of that.
“When you put the words ‘cancer’ and ‘exercise” together, it can feel like such a road block because it sounds counterintuitive to be exercising when you’re going through cancer treatment,” says Pickston.
“Years ago, people were told not to exert themselves and to take it easy. But in the last 20-plus years, we’ve had an explosion of research supporting the benefits of physical activity for cancer survivors and how exercise can improve the symptoms and side effects of chemotherapy and radiation therapy.”
Exercise can have a huge impact on your physical, mental and emotional health and increase your energy levels — all things that tend to be affected when you have surgery or are going through cancer treatments.
“Prostate cancer treatment can lead to several side effects like loss of muscle mass and physical strength, sexual dysfunction, reduced bone density, increased fatigue, and a higher risk of heart disease and diabetes,” explains Pickston.
Exercise plays a vital role in tackling these challenges and enhancing the physical outcomes of treatment.
“Current research demonstrates that exercise is safe and beneficial before, during and after cancer treatment as it improves energy levels and the overall quality of life, enabling individuals to continue enjoying the activities they love,” notes Pickston. “A physically active lifestyle not only helps in lowering the risk of various cancers, but also reduces the risk of recurrence in some cancers, including prostate cancer.”
Translation: Once you check in with your care team, don’t let your cancer diagnosis stop you from working out.
How often should you exercise to promote prostate health?
If you’re living with prostate cancer, are going through cancer treatment or have had a prostatectomy, you want to talk to your healthcare provider first to before you begin any exercise program as you may need to adhere to certain precautions during those first few weeks of recovery.
There’s no one set exercise that specifically focuses on prostate health — but if you focus on improving your overall health, increasing your heart rate, improving your blood flow and getting those endorphins going, you’ll find that those things will have significant positive impact on how you’re feeling overall and your ability to recover from your condition and treatment.
“Individuals who are physically fit or active before their cancer diagnosis are more likely to regain their previous level of functioning compared to those who lead a more sedentary lifestyle,” says Pickston.
“In oncology rehabilitation, personalized programs are designed to cater to each individual’s unique circumstances. Special considerations are taken into account, including your medical history, current fitness level, the type and stage of your cancer, and the specific cancer treatment you are having to ensure that the rehab process is both safe and effective.”
Everyone responds to cancer and cancer treatments differently. What works for someone else might not come as easily for you — and that’s OK.
“Each individual’s journey is different, and your focus should be on finding an approach that suits your specific needs and abilities, fostering progress and overall well-being,” encourages Pickston.
And don’t feel like you have to push yourself too hard — you can, and should, rest when you need it the most. Exercise doesn’t always have to be a one-hour routine, either. It can be as simple as standing up and stretching during commercial breaks, walking to the end of your driveway and back, or making sure you keep up with your daily living activities around the house like laundry, cleaning and showering.
“Just the act of walking or going up and down the stairs is something you can immediately do when you get home after prostate surgery,” says Pickston. “Be patient with yourself and avoid pushing to the point of pain or excessive discomfort or fatigue. If it’s been a while since you’ve been active or your overall fitness level is low, start slowly and gradually build. The key is to be as physically active as your current condition and abilities allow.”
Aerobic exercise for prostate and sexual health
Specifically, aerobic exercise (also known as cardiovascular exercise) has wide-ranging full-body benefits that can impact your heart, brain, joints, skin and muscles. It not only extends your life expectancy, but it can also decrease your blood pressure and heart rate, and increase your blood flow, which has a direct impact on your sexual function, mood, digestion and more.
Again, if you can’t hit the ground running that fast, you can do small things to work your way back up to that routine.
“Think about all the physical activity you can do like playing with your grandkids, dancing, gardening, carrying groceries or doing chores around the house. But it’s even better if you begin to incorporate intentional exercises like brisk walking, swimming and weightlifting,” says Pickston.
“It’s crucial for those undergoing treatment to understand that exercise is the best way to treat cancer-related fatigue. As your strength and fitness improves, you can engage in meaningful activities more easily.”
One specific side effect mentioned earlier is loss of bone density, which can lead to osteoporosis, a condition where the bones become weak, less dense and more likely to increase your risk of fractures. Weight bearing exercises such as weight training, yoga, Pilates and climbing stairs are ideal for preventing bone density loss.
“Starting slowly with light weights and gradually increasing the load is key to avoid pushing too hard and experiencing pain or exhaustion,” advises Pickston. “With time and consistency, you will notice improvements in your fatigue, strength and overall health, fitness and endurance.”
Caution for cycling as exercise
Cycling is an excellent aerobic exercise, but it’s one you might want to hold off from doing at least in the early weeks after having prostate surgery. The reason is because you tend to put a lot of pressure on your sit bones and your pelvic area while cycling, and this can cause discomfort, pain and swelling if you’re not fully healed.
“You need to be sure you are cleared by your physician before initiating cycling for any amount of time first,” says Pickston. “Once you receive clearance, there are various bike seats and bike shorts available to help cushion or accommodate the perineal area, alleviating some of that pressure.”
Kegel exercises
After having prostate surgery, it’s common to experience side effects like urinary leakage and erectile dysfunction. Kegel exercises specifically are designed to help strengthen your pelvic floor muscles and reduce the likelihood of those side effects from happening as well as help quicken recovery from those side effects. These exercises are also often recommended for some people before even having surgery so their pelvic floor muscles start off having a strong foundation before going into surgery.
“Your pelvic floor is often compromised after prostate cancer treatment because surgical or radiation treatment can damage the surrounding tissues, including the muscles of the pelvic floor,” explains Pickston. “When the pelvic floor muscles are compromised, it can lead to weakness, pain and dysfunction. Seeking help from a pelvic floor physical therapist can address these issues.”
It’s also common to experience muscle tightness in your pelvic floor and surrounding muscles after treatment, and doing Kegels without proper guidance can worsen this tightness.
“A pelvic floor therapist will help to make sure you are performing your Kegels correctly and help guide you in managing areas of muscle tightness in your pelvic floor,” says Pickston. “Learning how to engage the pelvic floor muscles correctly during daily activities can significantly reduce leakage. Sometimes, just a few simple adjustments in movement can lead to dramatic improvement.”
Healthy weight and prostate health
Having overweight or obesity increases your risk for prostate cancer — but it can also provide additional complications during the recovery process in some cases.
“If you’ve had a prostatectomy, it’s normal to experience emotional ups and downs, but the important thing is that you focus on what small things you can do each day, to feel better every day,” says Pickston. “Physical activity improves both your physical and emotional health. It’s important for managing weight, maintaining or building muscle, reducing your risk of heart disease and keeping your bones strong.”
“You want to get up, go outside and see what’s going on in your neighborhood,” encourages Pickston. “When you start exercising, your sleep improves. When your sleep improves, you’re able to heal better. And the more you can do early on, the more long-term effects you’ll experience along the way.”